


This post will teach you how to install and configure WP Super Cache plugin for increasing your WordPress site loading speed.
Website loading speed is important for web site owners as it hampers the user experience with the site as well as Google ranking. Today i will try to guide you how to make your WordPress website super fast with WP Super Cache plugin which helped many of my website to be stable even in spike of traffic. You may have heard about W3 Total Cache plugin too, yes it is known to beat WP Super Cache for performance but for newbies it is hard to configure. Whereas WP Super Cache is easy to install and configure so any one can make their website working with cached files within few minutes.
First you need to install WP Super Cache in your Blog : If you don’t know how to install plugin then this post may help you : How to Install WordPress Plugin
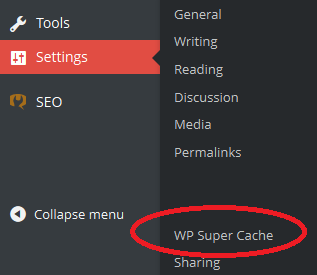
After installing WP Super Cache Go to the Plugin Setting.
As we have just installed the plugin we need to configure it properly to get its benefit. Lets do it step by step :-

- Enable Plugin : Tick on “Caching On (Recommended)” under Easy TAB [ it will show by default if you just activated the plugin ]
- Now switch to Advance TAB and tick the following:
- Cache hits to this website for quick access. (Recommended)
- Use mod_rewrite to serve cache files. (Recommended)
- Compress pages so they’re served more quickly to visitors. (Recommended)
- Don’t cache pages for known users. (Recommended)
- Cache rebuild. Serve a supercache file to anonymous users while a new file is being generated. (Recommended)
- Extra homepage checks. (Very occasionally stops homepage caching) (Recommended)
- Click on Update Status [ Also you may see the message to Update Mod Rewrite Rules, Do it by clicking Update button ]
- Now its time to set Expiry Time & Garbage Collection you can leave it as default or see the recommendations for the blog types and configure.
- The last thing to configure in Advance TAB is to enable Lock Down : Enabling this will make your blog ready for any instant increase in traffic [ Recommended to Enable ]
- It is best if you use CDN for your blog, doing so will help to load your website faster. I would like to recommend MAXCDN for CDN of your website.
- Now you can go to Preload TAB where you can enable “Preload mode (garbage collection only on legacy cache files. Recommended.)” and set the time to clean the garbage. It will automatically clean your old garbage collection just like as in Advance TAB. Click on Update Settings and Preload Cache for making it to work.
That’s it ! Now you can check your Site’s page-speed which will be much more improved than before. But wait… I have some thing more to recommend you which should be taken care after you complete configuring WP Super Cache. Install Better WP Minify plugin and Smush.it plugin after WP Super Cache. This is because Better WP Minify will help to combine your .js and .css files and Smush.it will help to decrease your image size by compressing it so your website will load faster .
So i hope you were able to increase your site’s loading performance by installing and configuring WP Super Cache. If i helped you to configure WP Super Cache then why not Share it to your friends :).